

vue3路由传参(一)
个人成长 | 独立开发者 | 创业历程 | 赚钱思维
大家好,我是一名独立开发者。在这里跟大家分享独立开发日常,编程技巧。欢迎大家跟我交流软件开发的一切事情,更欢迎大家下载使用我们的APP。
年后这段时间也没有怎么去跑单,主要时间都花在做一个新项目上。力争早日上线。这个新的项目用了vue3+viewui这套前端框架。接下来也会跟大家分享这方面的一些实践经验。
在现代的前端开发中,采用前后端分离这种开发模式跟传统的开发模式还很大的不相同。传统的开发模式传参都是直接在后台程序进行接收处理,前端几乎不需要对参数进行处理。但是在现代的前端开发中却截然不同。好了,先看一下具体的操作吧!
项目需要用到路由,首先需要把路由安装起来。路由是现代单页面应用(SPA)中管理页面导航的核心机制。在Vue 3中,我们主要使用vue-router库来实现路由功能。路由允许您在应用程序中无需重新加载整个页面就可以动态切换视图。
使用npm安装vue-router
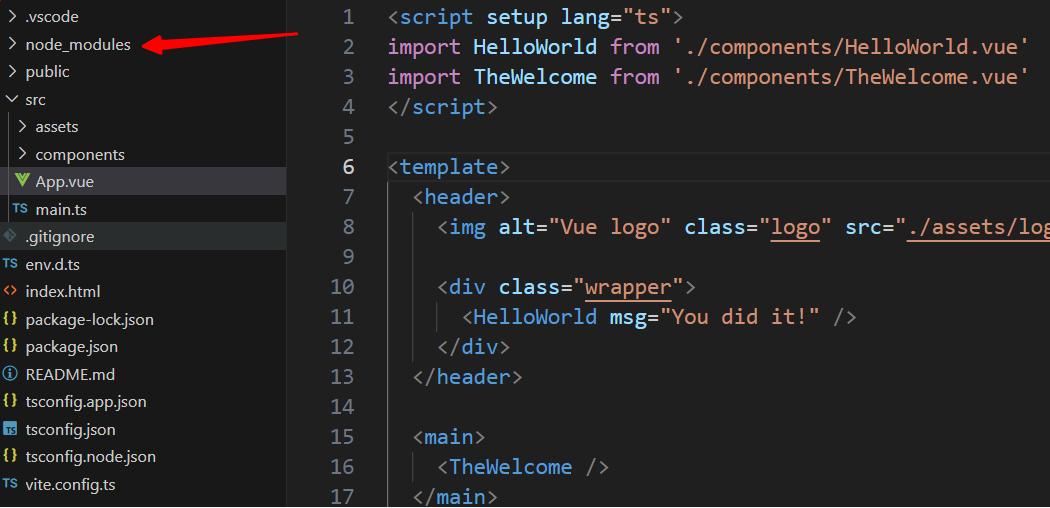
npm install vue-router在项目中的src目录下创建router文件夹并在文件中创建index.ts文件,创建路由实例。
index.ts文件内容:
import {createRouter,createWebHistory} from "vue-router";
import index from '@/components/Index.vue';
import tnews from '@/components/Tnews.vue';
import tabout from '@/components/Tabout.vue';

const routes = [
    {
        path:"/news",
        name:'news',
        component:import("@/components/Infos.vue"),
    },

    {
        path:"/about",
        name:'about',
        component:tabout,
    },
    {
        path:"/",
        name:'home',
        component:index,
    }
]

const router = createRouter({
    history: createWebHistory(),
    routes
})

export default router
在main.js文件中对这个路由进行注册;
import { createApp } from 'vue';
import App from './App.vue';
import router from './router/index.js';
const app = createApp(App)
app.use(router)
app.mount('#app')
在app.vue文件中,这里直接用了声明式导航,同时query进行了传参:
<template>
  <div class="content">
    <div class="left">
      <ul>
        <li v-for="item in Persons" :key="item.id">
          <router-link :to="{name:'news',
                        query:{
                          id:item.id,
                          name:item.name,
                          age:item.age,
                          sex:item.sex
                        }
          }">{{item.name}}</router-link>
        </li>
      </ul>
    </div>
    <div class="right">
      <RouterView></RouterView>
    </div>
  </div>
</template>

<script setup lang="ts">
  import {reactive} from "vue";

  const Persons = reactive([
    {
      id:"0001",
      name:"张三",
      age:16,
      sex:"boy"
    },
    {
      id:"0002",
      name:"李四",
      age:17,
      sex:"girl"
    },
    {
      id:"0003",
      name:"王五",
      age:18,
      sex:"boy"
    }
  ])
</script>

<style scoped>
ul li{
  list-style: none;
}
  .content {
    width:1200px;
    margin: 0 auto;
    display: flex;
    height: 600px;
    .left{
      width:300px;
      line-height: 30px;
    }

    .right {
      flex: 1;
    }
  }
</style>
在news组件中需要接收并处理参数:
<script setup>
import {useRoute} from "vue-router";
import {onMounted, toRef, toRefs} from "vue";
const route = useRoute()
// 方法一:
//通过这样也可以获取到参数
const name = route.query.name;
console.log(name)
// 方法二:
const {query} = toRefs(route)
onMounted(()=>{
console.log(query)
})
</script>
<template>
<div>
<ul>
<li>ID:{{query.id}}</li>
<li>姓名:{{query.name}}</li>
<li>性别:{{query.sex}}</li>
<li>年龄:{{query.age}}</li>
</ul>
</div>
</template>
<style scoped>
ul,li{
list-style: none;
}
li{
line-height: 30px;
}
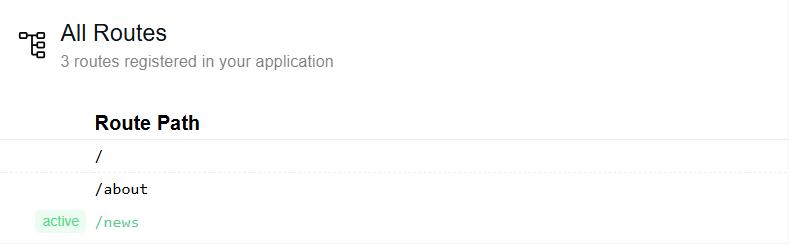
</style>至此完成路由在项目的注册,启动项目。在开发者工具中可以查看到刚刚注册的路由:
------------------ 华丽分割线 ------------------
创业举步维艰,感谢各位支持
欢迎大家阅读我的创业笔记,如果你觉得这篇写得不错的话,可以关注我的公众号:
成长创业笔记
第一时间查阅我们的文章!感谢大家的支持。
欢迎大家下载使用我们的安卓APP:
- ● 松鼠驾考:驾考刷题APP,新版的驾考题目内容持续更新。
- ● 松鼠天气:简洁的天气预报,日历工具
- ● 加我微信:zstxinghui

成长创业笔记


程序员小张
我们的主营业务:承接网站建设、小程序开发、安卓APP开发、软著申请等。欢迎咨询!
扫一扫,加我微信

随机文章

tp6自定义模版标签
2024-10-12 10:13:59

vue3路由传参(一)
2025-03-01 17:20:09

从失业到一腔热血的开始创业再到一地鸡毛
2025-04-01 20:03:14

在“卷”中寻找自己的机会
2025-10-09 15:45:32

创业不是拼命打工多干几份兼职,而是换赛道
2026-02-09 15:15:33